Showing posts with label Living Room. Show all posts

Tuesday, June 24, 2014

The Bane of My Existence

*** Let me apologize now if I get a little lengthy with this one. I am SO excited to have finally completed this simple project and to be sharing it!

There is one project that I've been wanting to tackle that is long over due. Very long.
It's our mudroom door. It leads directly from our small entry mudroom to our living room and you can see it from most vantage points on our main living floor. It's also dead set in front of you when you walk up the stairs in the morning. It's not really my kind of wake up call.
Good morning!
It has remained the dirty little secret that I have edited out of photos,
especially when I revealed to you our planked wall progress back in April.
I can't give you a good reason why we haven't tackled this project sooner.  Other things seemed more pressing I guess. Now that we have (no scrolling down), I'm regretting that we didn't do this months ago.

From the day we moved in I knew I wanted to replace it with a single lite french door, that we would paint to add some contrast and color. We finally 
(finally!)  took the first step back in early May, when we headed to Home Depot and placed a custom order for the door. The unfortunate part was that the order would take six weeks to arrive.

Fast forward six weeks to Thursday of this past week, when the door was ready for pick up. I may or may not have driven Jon crazy nagging him to go and get it. Then I may or may not have held my breath and crossed all of my fingers and toes, hopeful that we measured correctly.
Jon text me this photo of the door, just after he had picked it up.
The glass was covered in a protective film, and the finish was
primed and ready for some paint.
It really didn't look all that great in this state, to be honest.
Then it was time to select just the right color for the door.
That caused me a lot of heartache, and I'll expand on that process in a coming post.
Match maker, match maker, make me a match.
On Saturday,  the  longest day of the year, with Jon at work and the kids tucked into bed I was dying to get started on prepping and painting that door. 
I worked in the garage until the sunlight faded at 9:00pm 
(Why, oh why, can't we have this kind of light year round?)
The film on the glass can be compared to saran wrap coated in primer.
Peeling it back was a slow and messy process
(and I'm nearly certain if I had googled a method, 
I could have found a much quicker way of doing this)
but I was happy to be doing it, nonetheless.
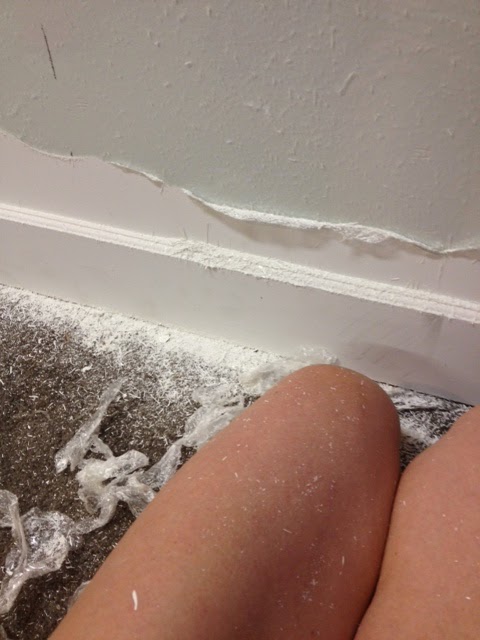
An hour or so later, it was looking a bit better.
The following day, after lots of vacuuming and dusting the door was ready for paint. 
This is coat number two, drying. 
After an initial hanging, we figured out we'd need to shave a tad off the bottom, which wasn't a huge surprise as the original door had required the same. Add door customization and installation to Jon's growing list of home skills.
Jon took care of it all quickly though, and a few hours later, I had a new door.
I love you new door. I love you, love you, love you.


I thought this called for a look back at how this area looked one year ago
where it went from this:
To this:
And this:
To this:
Here is the photo I shared before we built our nook shelving.
And here's that angle now:
We should have done this project much sooner. It was one of the last truly outdate pieces in this area, and the facelift leaves us feeling like we've progressed 20+ years with just one project. The space isn't yet complete, as I've been hunting high and low for just the right industrial bin for that lower nook (the measurements are fairly tall and narrow, which is proving to be a tall order to fill), as well as an entry rug. We also still have to work on the trim around the door. Oh, and I'm thinking some old rustic antlers might just be the crowning glory.

It was a simple and from my perspective a completely affordable upgrade. The custom door, plus hardware and paint totaled just over $200.00. I'd say that was $200.00 well spent.
Sources:
Single pane french door: Home Depot, special order, Masonite Brand
Hardware: Weslock Door Hardware, from myknobs.com
Paint: Benjamin Moore, Coventry Gray

Monday, June 23, 2014

The Biggest Ottoman in the World

A couple of years ago, my sister handed down her sofa and ottoman to us. Those pieces have served us well but, after purchasing our new leather couches we sold the old sofa via craigslist. I decided though, to keep the ottoman. I feel pretty confident saying that it's the biggest ottoman in the world. It's pretty much its own island.
The surface area is 51.5" x 51.5". That is more then 4' across!
It's so big that our 100 lb+ yellow lab uses it for his afternoon naps, and 
it serves as an awesome wrestling mat, a diaper changing station,
and of course the go-to, a foot rest.
The most unfortunate thing about its design is that it doesn't open up for storage.
Can you imagine how much junk you could fit in there?

The clear question after purchasing our two new sofas, was what would go in front of them.  Functionally, the ottoman works great, and with the age of our kids and our friends kids, the soft round corners fit with our  lifestyle. I definitely envision us upgrading to a large coffee table (or two paired together to fill the space) a few years down the road, but for the time being, there's no reason to part with this beast.

But, that doesn't mean I plan on leaving it how it is.

Enter, the slipcover.

This Furbish Studio Ottoman (going for 1k), was what kick started this idea.
Well, 1k wouldn't do it for an ottoman only meant to last a few more years,  so I started looking at upholstery fabric. Fabric makes my heart go pitter-patter. Before I could become overwhelmed by options, I decided to go with a good ole' standby,  this gray ticking stripe.
I chose it, because I love stripes. Anyway you draw them: ticking, cabana, pin, vertical, horizontal,  pencil, rugby, you name it. I feel its best to use a fabric that you know you won't tire of on a piece like this. Trendier and more seasonal prints are great choices for smaller things like pillows and throws, but for a larger piece that will be a focal point go with something that you know you'll continue to love. Oh, and it was like $9.00 a yard, so yeah, that may have swayed me too.

I had to wait patiently for it to arrive, and then, when it did...I wasn't happy with it.
Womp, womp, womp.

The background was far more white than I anticipated, leaving us feeling that the fabric was too light for the already light room. And, the scale of the stripes was too small for the piece. Amateur mistake.  So, in an effort not to settle, I'm continuing my fabric hunt until I find just the right option. This time I'll be ordering some samples, and I'm trying to convince myself to save up a few pennies and maybe go with a higher end print that will really make a statement. I do have a few requirements that I'm keeping in mind: it needs to camouflage dirt well, have a nice weight to it, and be washable.  Some prints that I'm considering:
                       
Lacefield's Bindi Paisley
This might countrify the living room a bit too much,
but I love me some buffalo check.
This would push my comfort zone a bit, 
but I think it would be awesome.
I've ordered this large 26" rattan nautical tray to sit atop the ottoman.
 My first order arrived damaged, so now I'm waiting on its replacement.
Heres to hoping it arrives in better shape.
I do however love the look for the awesomely affordable price,
and it's scale on our ottoman is perfect. 
When this piece is all said and done, I think it's going to make a dramatic statement in the room, and I wish I could have the whole project completed tomorrow. But good design takes time, and I'm learning,  a good dose of patience as well. The other detail I'm waivering on, is my ability to tackle this simple sewing job myself (insert tears and sweat), or to take it to a professional ($$).
So, what's your favorite of the fabric options?

Tuesday, June 17, 2014

Living Room Update: Bare Naked Wall No More

I've been staring at the space between these windows for months, trying to figure out what exactly I wanted to hang there. Antlers? Mirrors? Something sculptural? The bareness of the wall was really irking Jon too.
My decision was finally made when I saw this post up over at Lauren Leonard Interiors. She's a designer/blogger that I follow, and this is a great example of how your blog feed can provide great tips on products and pieces.

I have loved botanical prints for a while, and I toyed with filling all of the frames on our behemoth wall with them. But I could never find just the right botanical option. Some are super pricey, and not all have the aesthetic I like.

However, when she shared some that she recently nabbed up at Framedart.com for a really affordable price (they were 50% off at the time, with an additional 10% with a code), I was immediately sold. I went online and ordered six, for less then $10.00 per print. 
But then, what to hang them in?  I figured I would make a trip to the frame store to find an option. The day after the prints arrived at my house, I happened to be checking out Shopterrain.com. This site is an amazing source for organic inspired elements for your home. I'd love to bring home everything they sell, but their stuff is expensive, and I usually just get pleasure and inspiration from browsing. But, when I saw these Zinc Frames, it stopped me dead in my tracks.
I mean, I about died. Unfortunately though, my 13" x 19" prints wouldn't fit in this 8" x 10" opening. However, I'm definitely bookmarking these and have them in mind for a couple of spots in our house.

I picked up a couple of frame options in black at Aaron Brothers, but I wasn't in love with either of them. The not so common 13" x 19" print size was proving to be a bit of a challenge to accommodate, without doing custom framing.  In the end, I decided to go with frameless frames. I ordered them from Quadro Frames and they were very affordable. The final challenge ended up being that they aren't super compatible with hanging on a wall.

Last week, Jon jimmie rigged some hanging solutions for them though, and they're up in all their glory now. In addition, both of these windows have been dressed with roman bamboo blinds, to connect them with the other window treatments on the main living floor. 
I give you a bare wall no more my friends.

Jon and I like that the  roman bamboo blinds soften the window edges a bit, 
and add height and texture to the room, but we're not happy with their sizing. 
Unfortunately, the line I've purchased from doesn't make 
them long enough for the left window.
I'm thinking through some solutions to make them a bit more size appropriate.

Come back later this week where I'll talk about my plans for the ottoman in this space. 
I CANNOT wait to tackle that project. 
It won't be looking like this for very much longer!

Monday, June 2, 2014

Our New Area Rug

Last week I shared with you that I decided on the Pottery Barn Chunky Wool & Jute Rug for our main living space. After finally coming to the decision, my neutral loving heart really wasn't surprised (and you may very well not have been surprised either).
The more panned out view (keep in mind the room is just starting to come together now).
Buying a rug is a commitment, so I thought I might dive into my process of how I came to this final choice. 

First off, there are so many rug options out there. It can straight up be overwhelming to choose just one. My first step was identifying the size that I needed. The last two big area rugs that I've purchased, I've been left feeling they were just a tad bit too small, but I also know that was due to the rugs I wanted, the size options available, etc. Because this rug would really be the grounding factor in our main living space, I wanted to ensure that I had the proportions correct. So prior to beginning my hunt, I taped off measurements for a rug. An 8' x 10' didn't look like it would provide the coverage we needed, so after then taping off a 9' x 12' I had a winner. I wanted to ensure that the front of all of the furniture legs would be on the rug with space to spare. 

Moving along. I had an idea of my price range, which would help guide me while shopping. You can purchase rugs that are thousands of dollars and you can find them on the cheap, but I wanted a good quality rug and I figured I should be able to land one in the $500.00-$700.00 range. 

So then, I began scouring all of my favorite sites to see if there was anything that I just absolutely loved and couldn't live without. This included my favorite budget rug site, rugsusa.com (they run crazy sales all of the time and have a big variety to choose from) all the way up to spendier retailers like Serena & Lily. I considered striped options, ikats, you name it, I thought it over.
I loved this Zig Cotton Dhurrie Rug, however
they are expensive and they didn't have the size I needed.
Over the course of designing our home, I've learned that I really prefer living in spaces that are low contrast with lots of texture. That's certainly not to say that I don't appreciate a home with color and contrast. I also know how finicky a person I am. By purchasing a rug in a great colorful pattern, I would no doubt tire of it in a year or so. Yep. I would be ready for change. Because a large rug isn't an expense I want to have every year, something that would be more timeless for me was what I was looking for. 

In an attempt to push my comfort zone a bit, I first considered, and nearly purchased the Knotted Diamonds Wool Rug - in Horseradish from West Elm.
It had texture and pattern. I also thought the yellow would work well with some other yellow in our house. But, in the end I was afraid that I would tire of the pattern and that perhaps, it would limit other textiles that I want to bring into the space. 

While on West Elms site I really liked their Mini Pebble Wool Jute Rug as well.
It was neutral, to say the least. But again, I liked its knobby texture, and I liked their how the rug looked used in spaces.
It was priced at $749.00 for the large size that I needed, plus tax and delivery. Yes, it was expensive, and I really thought that I needed to be a little bit more dramatic with my choice. I was feeling a bit guilty for wanting a neutral rug. So, I decided to look over some of my favorite living rooms on pinterest to see if I could help get some inspiration.

Emeraldcoasthomesonline.com
LaurenLeissInteriors.com
Southern Living Idea House 2012

Houzz

The decision seemed pretty clear to me. I love rooms with neutral, textural rugs. I don't think there's anything boring about them. I think they create a great layer upon which to build a room.

In an effort to  beat the price on the West Elm pebble rug that I liked, I checked in over at Pottery Barn. That's when I discovered the Chunky Wool & Jute Rug and realized that it was on sale for $549.00. Because the percentage of wool to jute in the rug was pretty great, I figured it would be soft enough to meet our needs. 
But I'm not done yet…

One thing I always do prior to making an online purchase is to search for the item in google images and pinterest. This allows me to see it in a different (not professionally photographed and styled) setting. What I found was a blogger who had purchased the rug and wrote about it. Her reviews that it was super soft and cushy had me sold. 
So that my friends, that is how I came to my decision. 

Short and sweet right?

I never over think anything right?

We are completely pleased with the purchase, so now it's time to jump into the next project in this space!