Monday, March 31, 2014

Out with the Old, in with the Schoolhouse

I've mentioned my despise for our ceiling fan many times. It. killed. me. Literally, the sight of it physically pained me. And, I had to face it so many times a day.  You can see our ceiling fan from almost every room in our house.
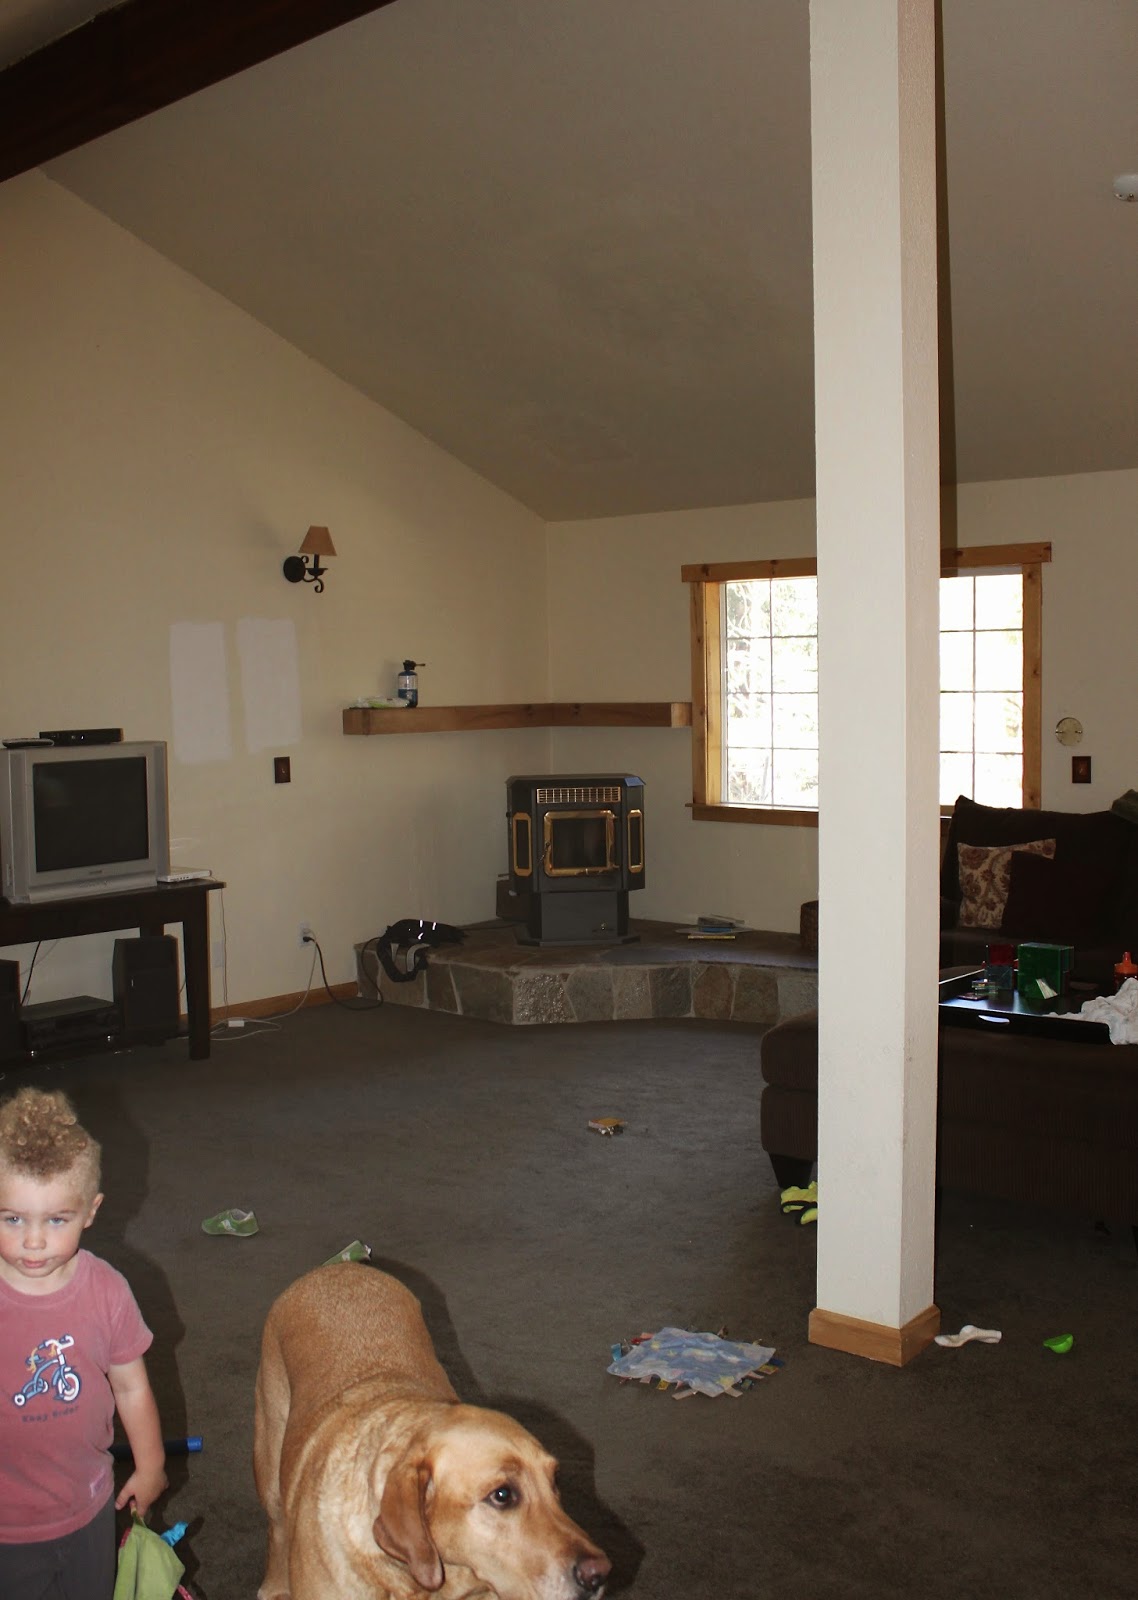
You see it immediately when you walk in the front door.
(Talk about bad first impressions).
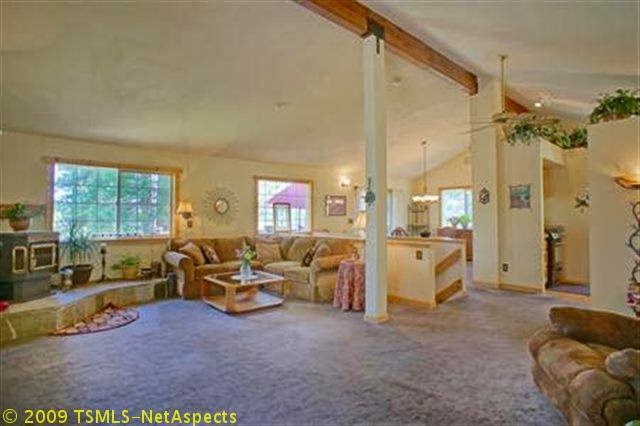
And first thing in the morning when you walk upstairs to grab a cup of coffee.
(…And no, we absolutely have not finished painting our ceiling. We stopped where the kitchen begins, just as I'm sure any professional home builder would. It's on my short list of projects to get done. And yes, we still have that ugly front door with no molding. We have issues, I'm completely aware). You see it from the living room, dining room, and kitchen. This brassy beast was staring at me everyday, several times a day and I developed a passionate dislike for it. 

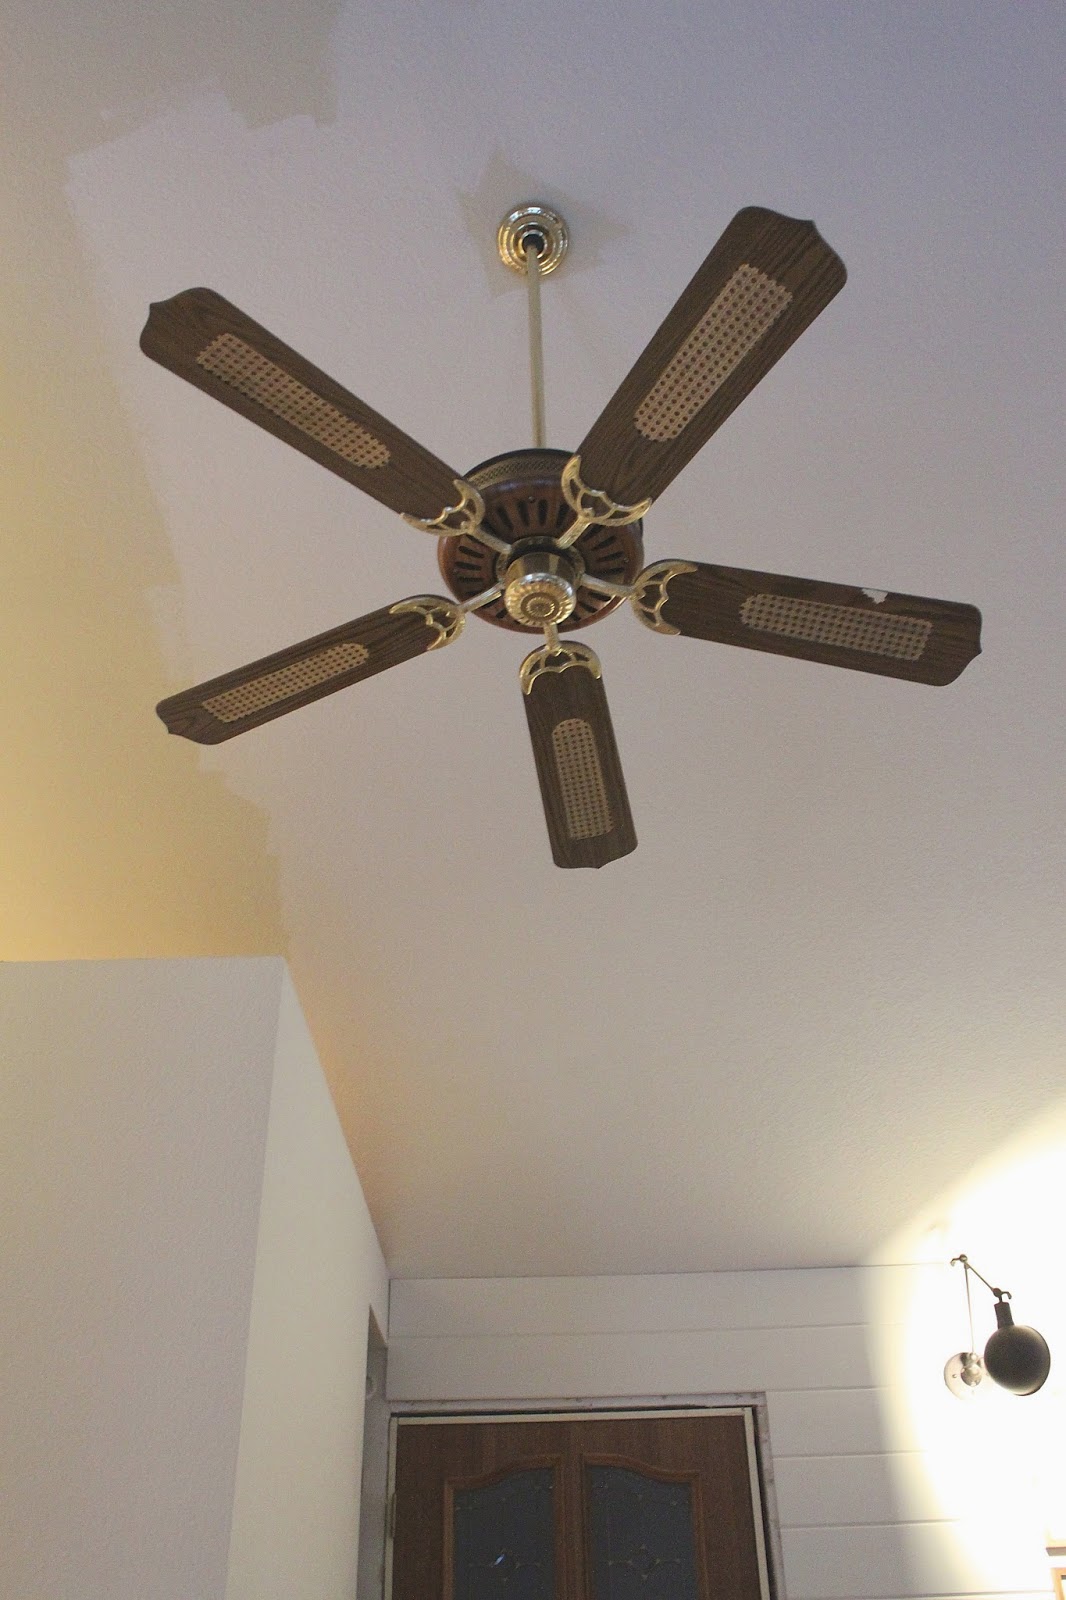
Ceiling fans can't be that big of an expense, why not just replace it immediately when we moved in? That was my common train of thought before I was a homeowner. "It can't cost that much to change that out, just buy a new one". But then I realized that you had to prioritize. A pretty fan whirring over wall to wall blue carpeting wouldn't really help our home, so it got bumped down on our to do list.

But now, it's at the top.

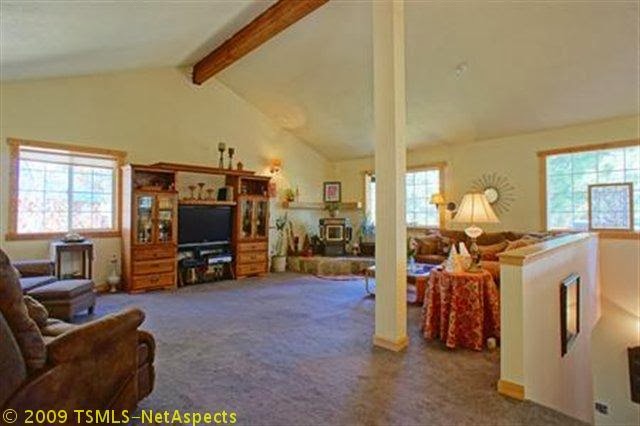
You WOULD NOT believe how much time I spent shopping for a new ceiling fan. I'm sure I could have learned French in the same amount of time that I spent looking for just the right option.  And maybe located flight 370.  Because again, it's only a ceiling fan, but because you see it from so many vantage points in our house,  the upgrade had to be good.

I identified this fan early on in my hunt as my favorite.
It's the Schoolhouse Ceiling Fan from the Period Arts Light Company, and I found that Lumens had the best price on it (after several months of online stalking, I found that this brand never goes on sale). I liked it for its clean lines, simplicity, and schoolhouse fixture. But it was certainly an expensive choice. You can find ceiling fans at big box stores like Home Depot and Lowe's for under $100.00, but after scouring loads of sites for a more affordable option, I always came back to this one. If this was going to be so visible in our house, it was okay to spend a little more money on it, right?

 I had concerns about it for our home though. Was the light too large? Could I really handle another wood tone in our house? To add to that, I couldn't find a sample image of it in a home, anywhere. Would it be proportional to our space? I found some other options that I was attracted to, but they all came at similar price points, some even more expensive. My favorite retailer of ceiling fans turned out to be Restoration Hardware. Here's the round up that I put together of the best options I found on the market.

After over thinking this decision for far too long,  I was exhausted of ceiling fan shopping, so I decided to just freak'n purchase it already.  I decided to order mine with black blades, as opposed to the maple shown above. The problem was, I had no idea how it actually looked with black blades (it is always shown retailing with the maple blades). So I was taking a leap of ceiling fan faith, ordering an expensive item (that would be expensive to ship back), without actually knowing how it would look in all black.

Oh, and Jon was opposed to the black blades. But I went ahead and did it anyways (without telling him, mind you). The reason being,  I could not wrap my head around having yet another tone of wood in our house. I. just. couldn't. do. it. That was the same reason that I couldn't get on board with most of the options above. The other reason being some of their price tags.

Anyways, this is all the long way of saying that we finally FINALLY switched out our ceiling fan.


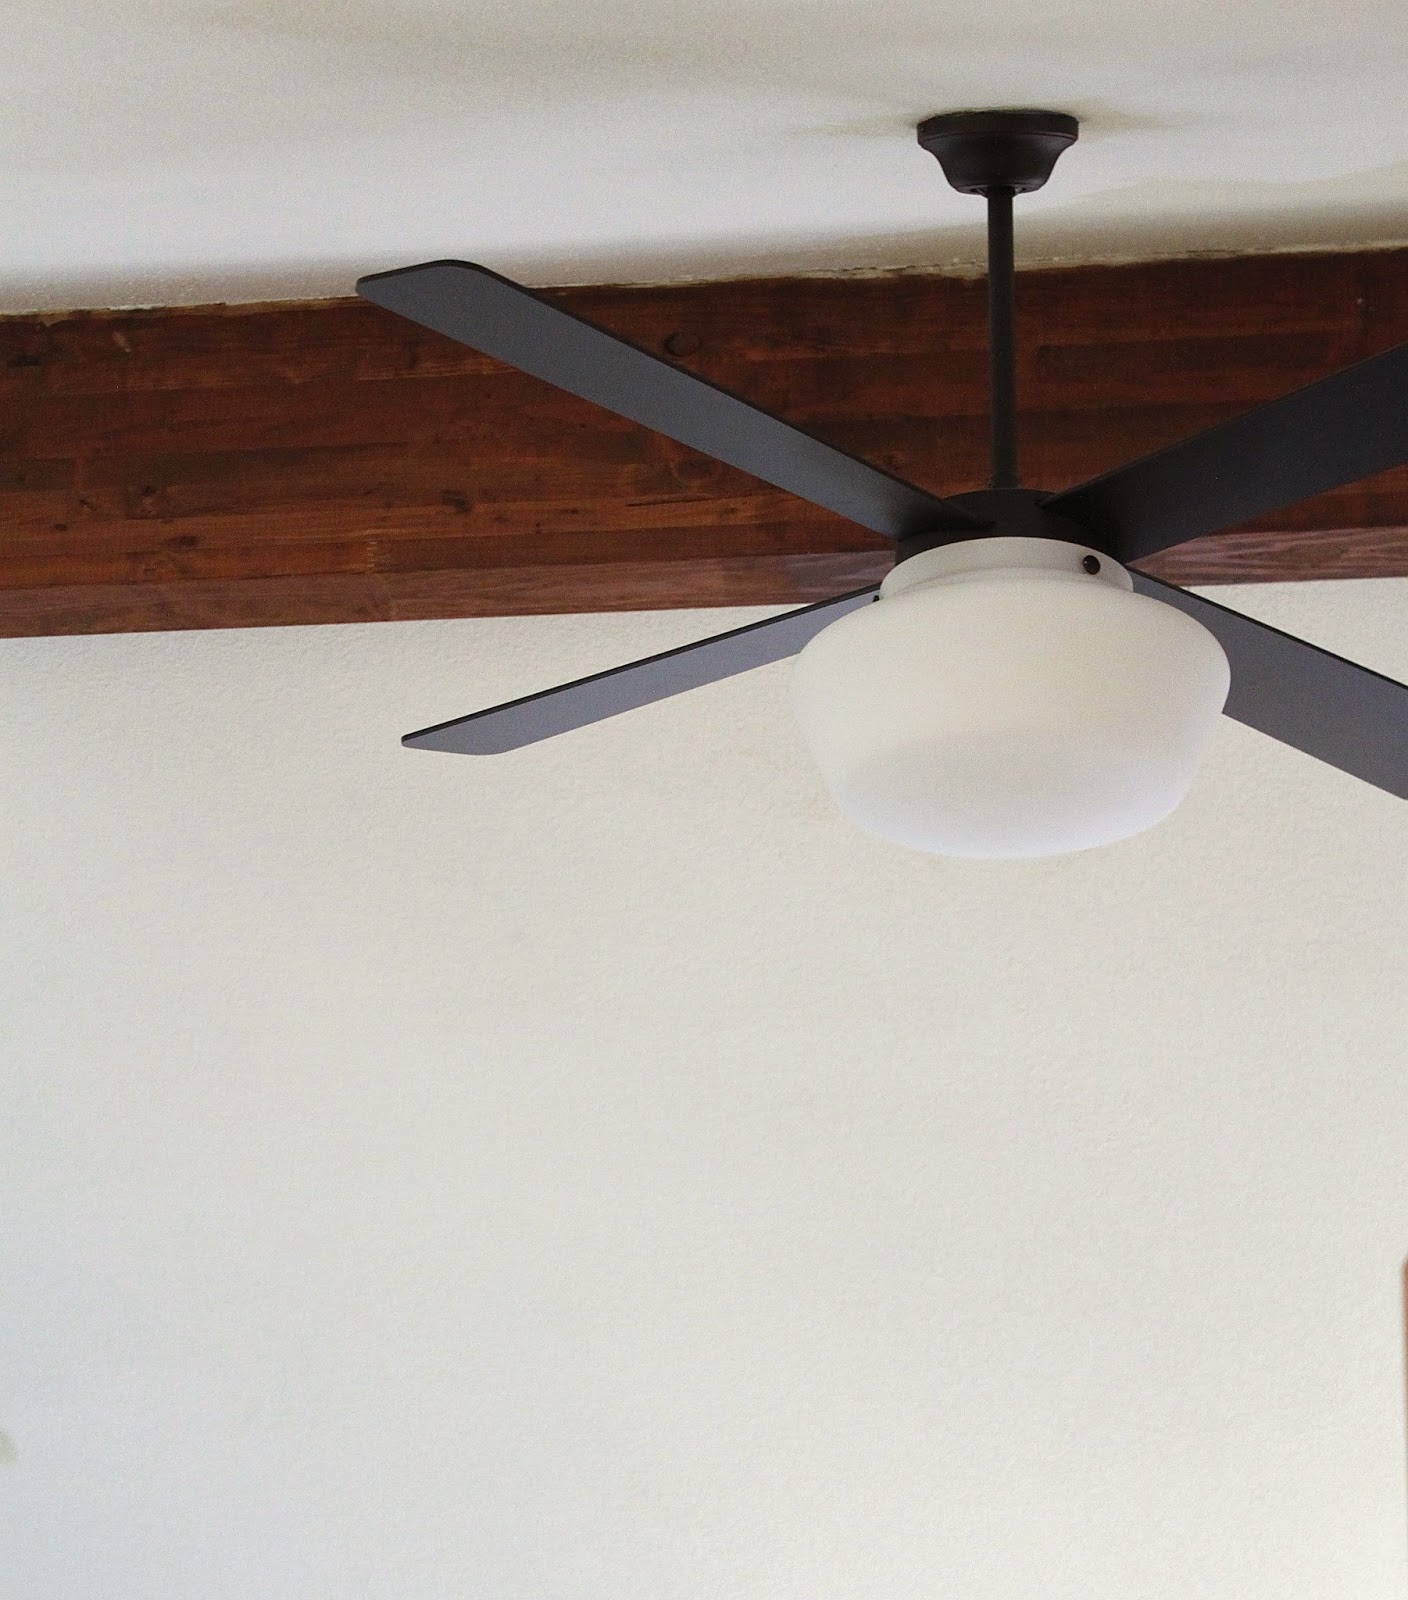
Now, this was almost an "I messed up post," as I didn't love it when I first saw it in our house. It was certainly an upgrade, but was it worth the money? Before purchasing, one of my fears had been that with all of the black, it would seem like a spider was a clinging to our ceiling and spinning overhead. When I first saw it, my suspicions seamed valid. 

And Jon and I both agreed that yes, the schoolhouse light was too large. 

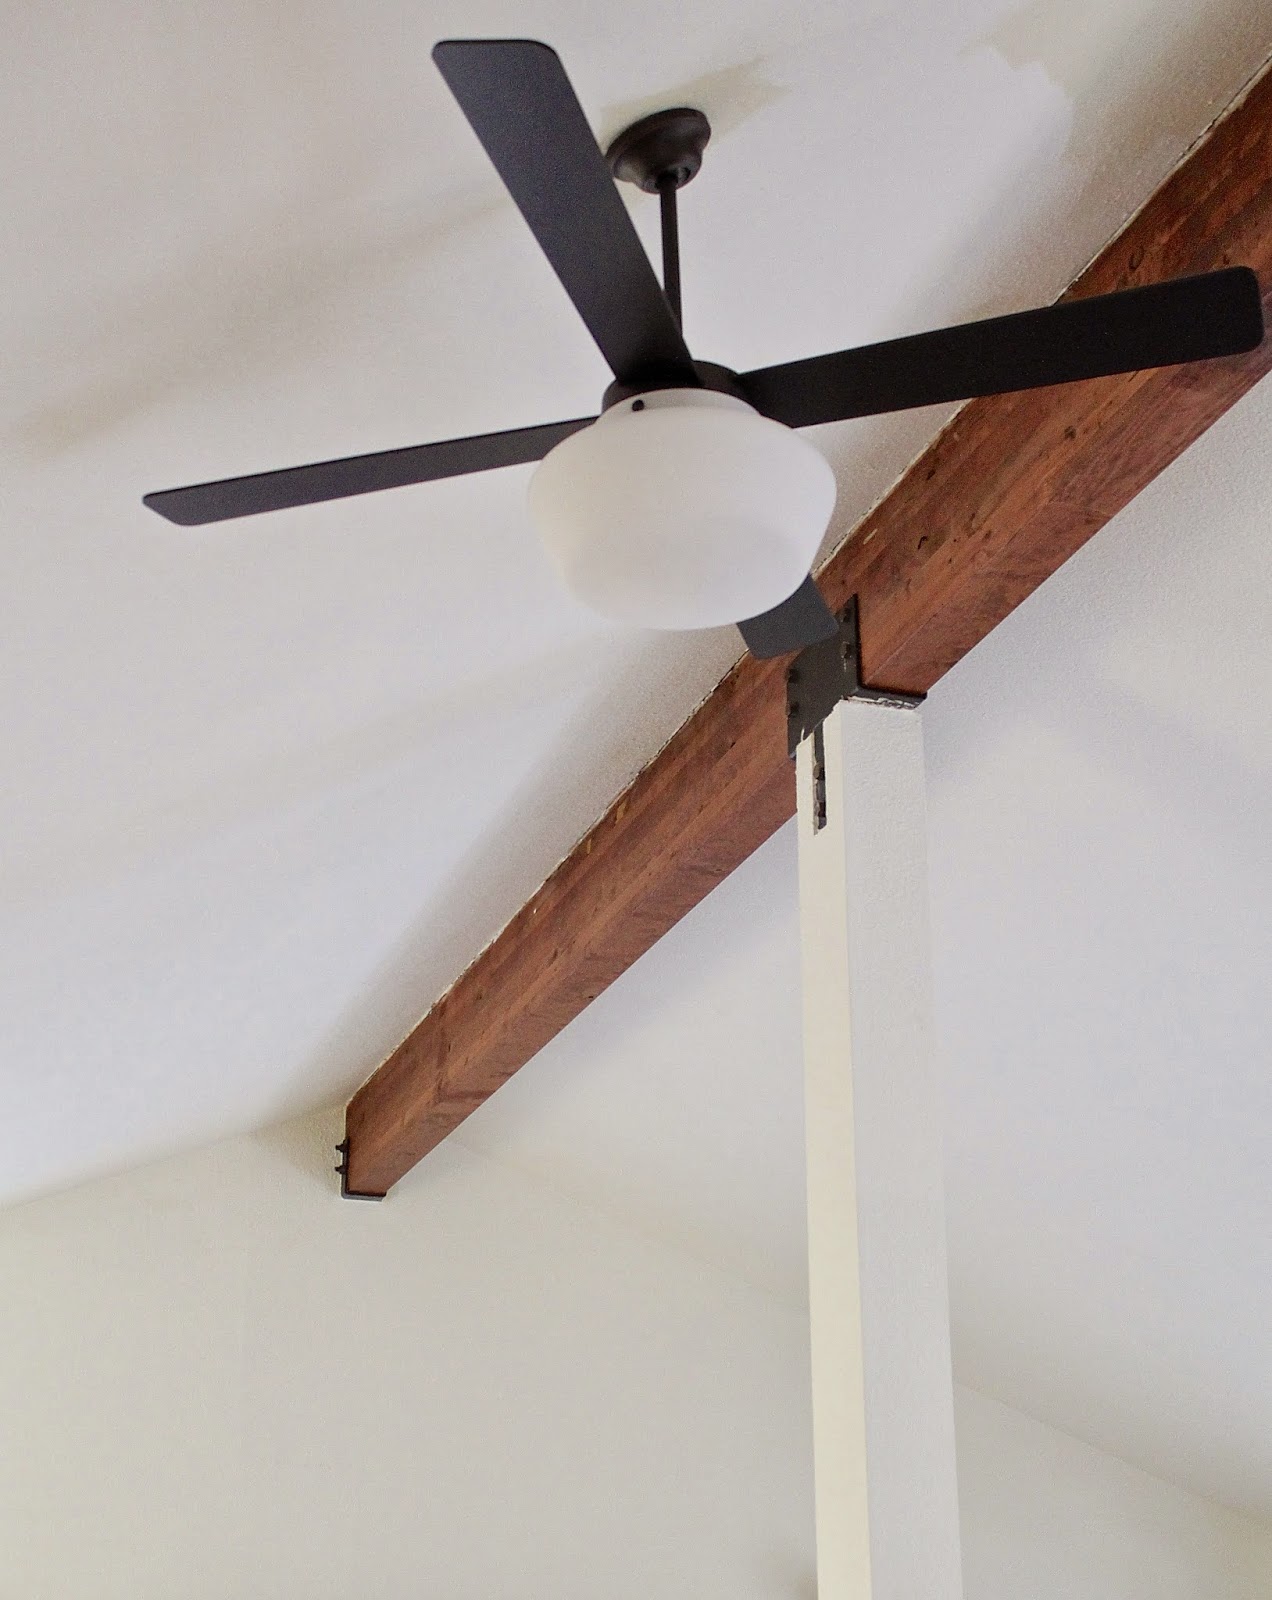
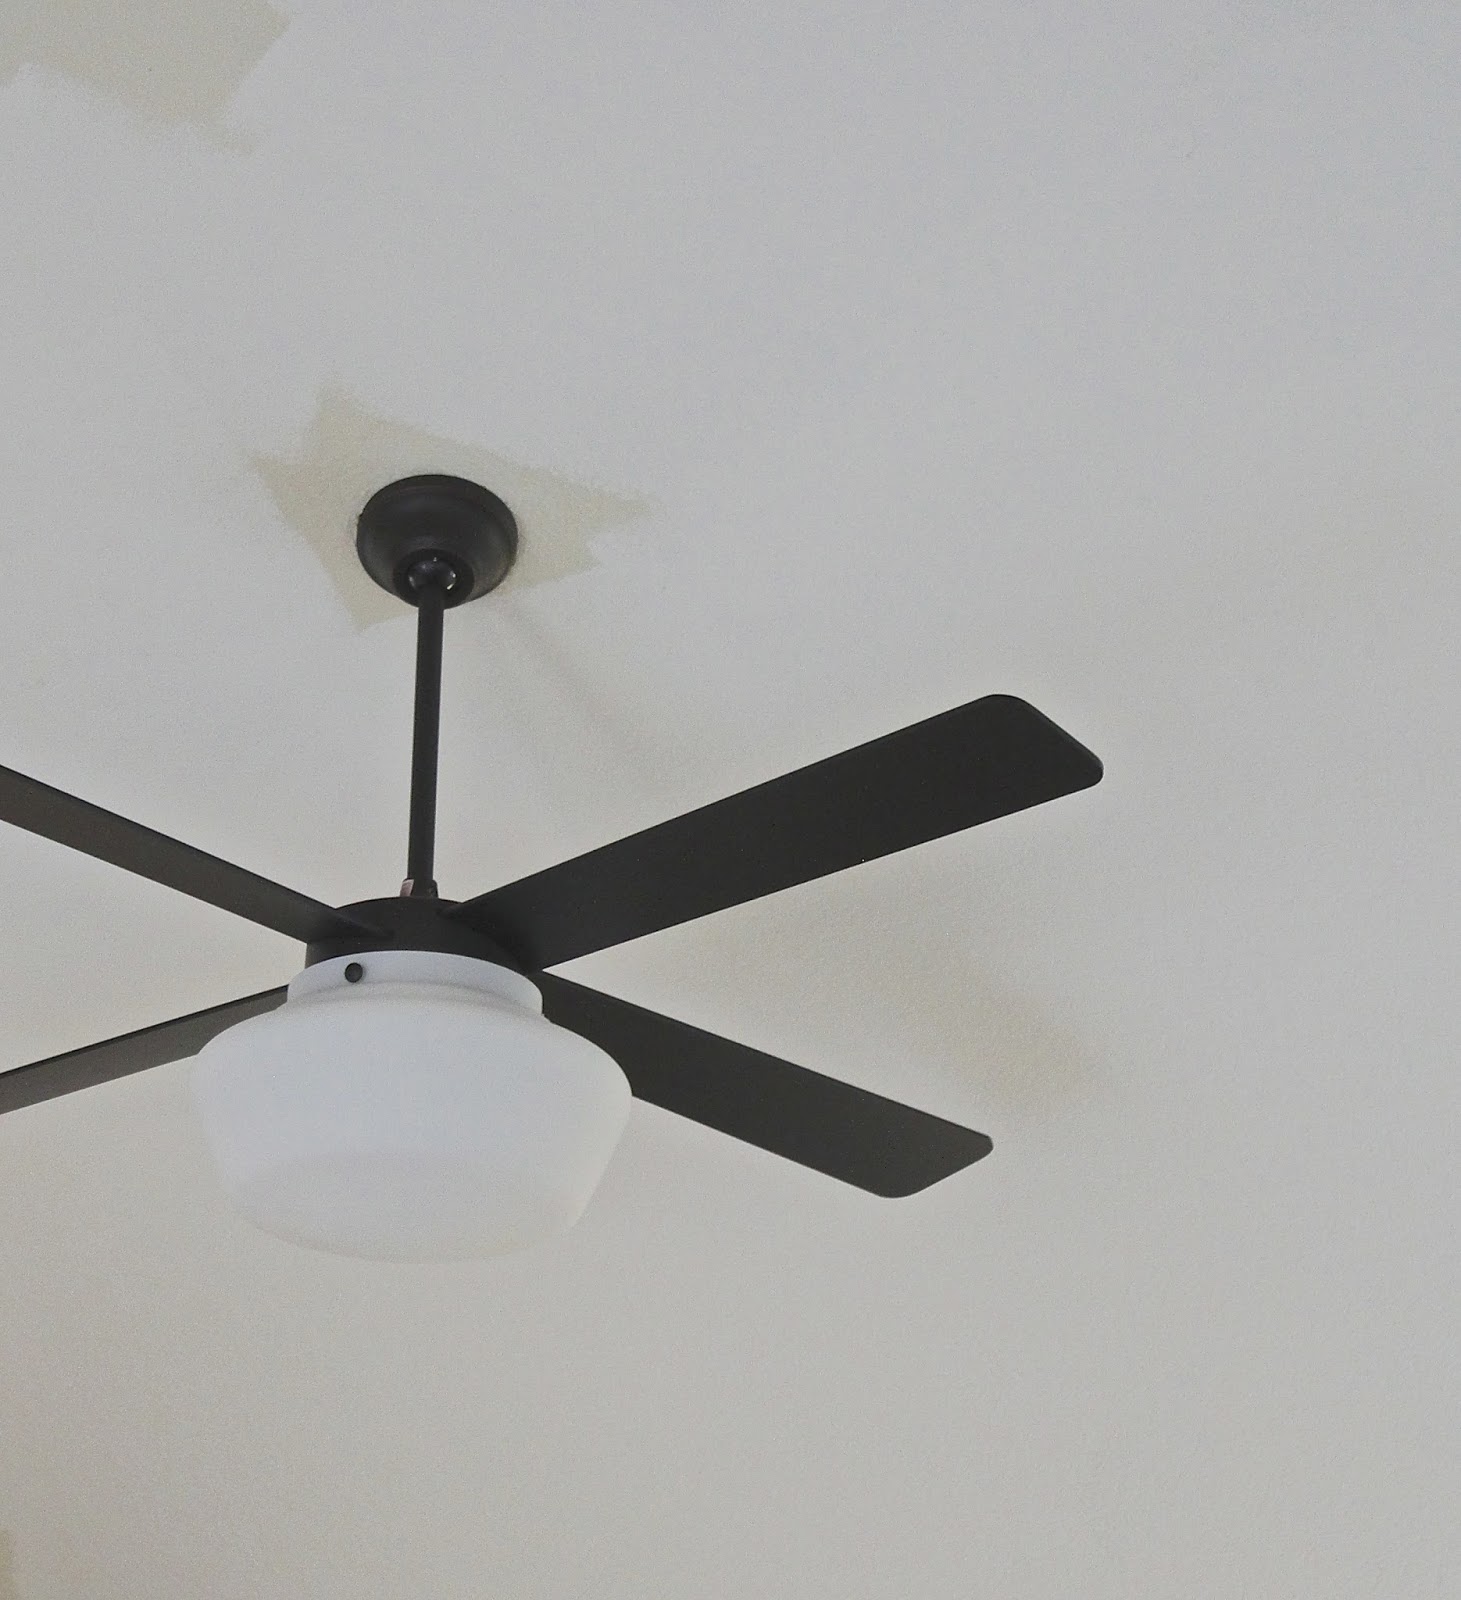
BUT, after several days, I warmed to it. Jon likes it, and he loves it for the amount of light it puts off (this thing can light up our whole main living floor, but not obnoxiously so). And we love that it is on only a 12"rod, as opposed to our previous fan, which was on a 24" rod. Having the fan so much closer to the ceiling really opens up our entrance. So my takeaway advise for you: if you're replacing a fan, consider hanging it high, on a shorter rod, to help bring your eyes up. 

And of course, if you're in need of an old ceiling fan, let us know. Otherwise the first taker on craigslist gets it (I really hope there's a taker, because I hate creating waste, and my brass beauty is taking up space in the garage.).

Thursday, March 27, 2014

Our Hardwood Floors: The Reveal

Last night we started moving furniture back into our dining and living room, and finally got our garage, workshop, and life back in order a bit. I'm so looking forward to having a functioning home again. We're dusting off every wall, windowsill, light fixture and counter surface, and trying to get tools put back in their rightful places. Our fridge is still in our mudroom, and our TV is not yet hung, so there is still lots of "moving back in" to do. But, I didn't want our slow pace of cleanup to delay me from finally showing you our floors.

After the floors were fully laid, here's how the home front was looking just after Jon finished sanding (vacuuming up remaining dust here). He sanded for about eleven hours, with four different grits of sand paper. Did you know it takes that many hours to sand a floor?
Immediately, the orange-ish pine trim around our windows
started sticking out like a soar thumb.
Add those to our project list.
We were overjoyed that they were finally all in place,
but we knew we wanted the tone to be a bit darker then their natural color.
So on went the sealer, and coat one of the water based poly finish.
We wanted as matte a finish as possible, 
and just as we hoped, the products we used helped to darken up the floors
and pull out the brown tones just a tad.
I haven't talked about our kitchen a whole ton, but I will. Someday.
It's in need of new light fixtures and lots of styling
(and yes, we've finally cleaned up the counters after taking this pic).
We had a few things going on this past week, what with work, a ceremony at Jon's department, doctor appointments, etc. so we stayed off of the floors for several more days giving them more time to dry and the sealer to harden further. Just to jog your memory, here's a look back at some before's again:
The real estate listing photos of the dining and living room, 
from about one year ago.


And then we moved in, and things looked like this for a while.

Dining room with our stuff parked there.
And finally, how it's all looking today.


Does it look like a different house? I hope so. That's kind of what we were going for.

In case you're considering a similar project, here are our floors by the numbers:
White Oak Character Grade Hardwood Flooring, 800 sq feet: $3,800.00
Plywood for subfloor: Approximately $600.00
Underlayment: Approximately $500.00
Bona Seal & Bona Traffic sealer and finishing system: $550.00
Miter Saw: $340.00
Floor Nailer: $250.00
Rental Sander: $80.00
Misc. supplies (Tack cloth, knee pads, etc.): $400.00
Misc. expenses (Including meals out, hotel room, additional gas): $250.00
Square Footage covered: Approximately 725-800 Square Feet
Days to complete: 12 days and nights of installation + 3 days of drying
Amount of fast/pre-packaged food consumed: far too much
Marital spats: 1 

It's estimated that we saved approximately $6,800+ by handling the demo, disposal of materials, install, sanding, and staining ourselves. That's about $6,800 that I desperately need to put towards new furnishings, so I'll take it.

We'll be taking a breather before we jump in to all of the finishing work that's to be done. Jon is in need of some fresh air (ie. time on his dirt bike) and some rest (ie. a few well deserved naps). There are baseboards to choose and install, walls to be patched and touched up, door trim to take care of, and now we have to figure out what to do with the too-orange-for-us window trim. So you might consider this a flooring progress post, instead of a full on reveal. It's already crazy for me to look back at the blue carpeting. I've already forgotten what it looked like.

Monday, March 24, 2014

Life as of Late

***I'm in the midst of a blog design transition, so bear with me. I'm hoping to have a professional build a site for me soon, but until then I'm too tired to compose a site I love. Content is the same and hopefully this place will have a new face soon!

You've probably heard the saying that goes something like "home renovations take twice as long as expected, and cost twice as much as planned". Well, low and behold, it's totally true. It might even be an understatement.

Last week, the kids and I were homeless while Jon was in flooring install mode, so I wasn't able to get a post up, but it leaves me with lots of updates for you. Here's a little play by play of what life has been looking like in our parts lately (most photos are i-phone pics, apologies on the quality).

February 27th-March 13th
I shared with you here that we finished up with phase I of our flooring install, which was installing floors in the dining room.  We covered them, stored our remaining flooring planks there, and went on with tackling painting and demo projects while prepping our house for the bigger phase II of install.
That included tearing up our half bathroom
(located right off our dining room).
More on that space later.
We were playing lots of musical furniture. As we painted one section of ceiling, we moved the couch this way. When we painted another area, we moved the console table over there. The dining room table sat in our living room. The ottoman sat in our garage. It was one big ole' beautiful mess, and yes, we lived like this for several weeks. Looks like fun, heh?

Go with the flow. 

We also needed to decide on the stain for our hardwoods. We tested out several of the Minwax stain shades, as well as a couple of Old Masters stains. After exhausting both lines, we didn't have an obvious winner. We wanted to avoid any red/orange/yellow tones, but we didn't want anything too dark. 
We loved our wood and decided that we wouldn't settle for an imperfect stain, so we would just do a clear sealer if needed (the center board is samples of a clear sealer in two different brands). If we had more money in our pockets we would have had a custom stain mixed (and applied), but that wasn't an option for us. After testing some different water based poly sealers, we found that sealing the wood brought out the darker natural tones that we were looking for. Ding. Ding. Ding.

Our good friend who assisted us with purchasing our hardwoods also helped us in securing a great quality sealing system for our new floors. We purchased BonaSeal and BonaTraffic through her (both are designed for commercial and residential high traffic use, and not available for retail), which from my research showed to be a a much higher quality brand then most you'll find over the counter.

March 13th & 14th
With the kids in daycare and me at work, Jon (with the help of a friend) removed the remaining large pieces of furniture from our living room and fully pulled up the carpet. We set it out in our driveway. Totally professional, right?
When I returned home from work on Thursday, this is what life was looking like.
It was apparent that at some point the previous owners had
 stained the tongue and groove sub flooring,
 using it as their main flooring in the entrance area
(you like that baby gate that Jon built for us?).
The preparations were "in process" for so long,
that Jon and I were relieved to finally be tackling this project.
Because our main living floor wasn't really suitable for dinner and play, 
we converted our bedroom into a family room/dining room/play room.
As you do. 
                    
Maintain your cool. Just go with it.

March 15th-18th
So that Jon had several days and nights completely uninterrupted, the kids and I headed out of town. My parents were out of the country so the kids and I had free reign at their house, which worked out superbly. We also fit in lots of quality time with cousins.
Quincy and Delaney (two months age difference) having a snack.
The weather was divine with temps in the mid-seventies.
 I even had to stop and buy myself a pair of shorts.
Quincy had her first experience on a swing. Loved it.
Nolan was dirty and barefoot most of the trip.


This is fun. I can keep the kids out of the house for 7-10 days. No problem. 

We survived Ikea with four children, only just barely.
There were tears.
There was roughhousing.
There was a mom that was raising her voice.
But we made it out alive.
Barely.
We also took a trip to Target to peruse the aisles.
I finally settled on baskets for my dining room console table.
They were the right price. And the right look. And almost the right dimensions.
A whole post on that area is in the works.
I was loving these small cement planters for our soon to be outdoor deck space.
I was  happy to be keeping myself and the kids out of Jon's hair.  He was working sixteen hour days to try to get the flooring laid, but progress seemed to be slow going. We were a day or two behind based on the rough timeline I had laid out for us. He was doing amazing work, but apparently craftsmanship takes time. Every so often at my urging, he'd send me a photo update. 
I'm thankful that he's a perfectionist when it comes to these types of projects,
as I am not.
When we returned back to town late at night on the 18th, he was still awake and
working but the house wasn't exactly functional for a family of four.
My Lord, this is exhausting and we have so far to go.

Our fridge was plugged in in the living room (with very little food in it). Our kitchen was covered in dust. So I did what any good natured woman would do; I checked the kids and I into a hotel the very next morning.

March 19th-21st
Jon needed more time. He needed no interruptions. Seven days in and the process was wearing on him. I tried to remain his encouraging cheerleader, but by this time we were both ready to be at the finish line.  I had always planned on staying at a hotel if it came down to that, so I was mentally prepared to pack us up and head us out.
Somehow we lucked out with one of the best rooms on property.
That yurt in the photo is where Jon use to work.
Thank God for hotels.

I definitely felt a pang of guilt that the kids and I were enjoying mountain views and extra comfortable beds, while Jon was working into the wee hours of the morning.  After two days of daycare pick ups, drop offs, runs by the house to see Jon with some food, and stops at the grocery store (with a teething little girl) I was ready to be at home and I didn't want to continue spending our already spent budget on a hotel room.
Jon and his girl when we stopped by after work
(and that's the dirty flooring stache that he grew).
March 21st-23rd
The kids and I arrived back at home Friday night after work as Jon was near to completing all of the sanding. We all picnicked on our back lawn, and then Jon and I stayed up late filling nail holes and any small gaps with wood filler. We were so close. I could taste it. It was finally time for one last sanding and sealing of the floors.

That brings me to today. They are sealed and drying and most importantly, done.  You'll have to come back later this week to see how they turned out.

Wednesday, March 12, 2014

The Elephant in the Room

I have a secret to share. There's something I've been hiding from you. I edit it out of all of my photos.  I always try to look the other way. I tried to pretend that it didn't exist, but it did (but now it doesn't!). It's our fireplace.

I thought it was gosh darn awful from the moment we set foot in the house for the first time. Now, it's finally time to face the elephant in the room.
The fireplace and living room many months ago.
My apologies. I know. It's hard to look at.
Our house was equipped with a pellet stove when we purchased it. Pellet stoves are reasonably popular here due to their efficiency and the low cost of pellets. Eventually we located the original receipt for this thing. No surprise by the looks of it, it was purchased in the early 90's. It's huge, far bigger than current models on the market. And because of its age, it also had a somewhat loud and distracting fan to help circulate the warm air. Kind of kills the whole, warm and cozy vibe. And I kid you not, it also required a small blow torch to get it lite. So yeah, there was a whole lot that wasn't right about that beast.
The home on our final walk through before we got the keys.
And the brass. Oh, for the love of brass.

As for all of the stone work, based on marks on the ceiling above and wall behind, we guess that the house was originally equipped with a wood burning stove, and this large shelf of a stone ledge was probably utilized for stacking and storing wood. The stone shelf takes up so much space. We've been using it for toy storage, which only added to it's astounding beauty. With our house on the modest side of the size spectrum, it killed me that valuable living room seating area was being taken up by purposeless stone. 
The fireplace as seen in the home listing last year.

Then, there's that damn wood shelf above it. While I like the stain of the wood, I dislike it for being out of proportion for the wall. If I cared to invest time and energy in this area as it was, I would have purchased many large frames and layered them to help fill the void of height above it. But, I just didn't want to spend money on a bandage for this area. It wouldn't really take away from the bad stone and stove, now would it?
Recent Reveal by 6th Street Design School
A friend of ours gave us an idea to just remove the whole thing. Why try to make something work that wasn't working? I needed this headache gone. So gone, it went.
First Jon removed the extended shelf portion. 
We immediately liked gaining useful square footage under that window
(and those are our newly white walls my friends!).
Then, he disconnected the pellet stove, 
and got to work on the remaining section
(that's the little blow torch that I mentioned).
We salvaged all the stone to reuse in our garden,
and we're craigslisting the pellet stove so that hopefully it can be recycled
in a home that needs it.
The whole demo took about four hours.
Our kids are becoming champion nappers.
They slept through much of the sledge hammering.
The removal left us with patches of pink paint 
(I'd like to meet the man that lets his wife paint a living room pink)
damaged drywall, dust and cobwebs.
After we complete the floors, we have lots of detailed finishing 
work to take care of, patching these walls is being added to that list.
Because our garage is currently set up like a paint shop, 
and I don't have to worry about drips on the outgoing carpet
I gave it a really quick fifteen minute roll over of white paint.
It's feeling better already.
Our plans for this space? We have some ideas, and plan to install a new fireplace down the line. It's not a priority in our budget at the moment, so that won't happen for a little while.

At church this week, the sermon was in regards to expressing gratitude, praise, and giving compliments to the strengths of individuals. I certainly praise Jon for the blood, sweat, and probably in the upcoming week, tears that he's putting into all of these projects. He would rather be on the mountain snowboarding or working on his dirt bikes, but instead all of his free moments are directed towards knocking out all of these projects. I have so much faith in his ability to install the hardwoods flawlessly.

I might try for a hat trick this week, and share another area that we demolished this weekend. But don't hold your breath.